By now you probably already know how powerful RealTimeDesigner is and lucky for you integrating with your existing website is very simple, and it’s how most RTD users begin. It’s important to recognize that RealTimeDesigner is not intended to replace your website, but rather works best in partnership with an excellent website. Your site will provide a “storefront” to introduce clients to your product, draw new clients in and provide more information about your company and policies.
By allowing us to host your designer and only linking in when needed, you’re taking advantage of our servers to host a powerful online design tool. A designer like ours takes a lot of computational resources, and by hosting ourself it allows us to divide the astronomical costs of such a server among many users, while also allowing us to simultaneously push updates to every last user instantly. When we add new features, you’ll have them immediately! However, because we host the software, this means you’ll need to tie your website into your RealTimeDesigner account. This is not as daunting a task as it may seem, so we will start with the most common integration method.
Link Directly From Your Website
The easiest and most popular way to use RealTimeDesigner is to simply link directly from your website. When you create a new product in your RTD account, they will automatically create a unique url. These urls usually begin with http://designer.realtimedesigner.com/companyname/. There will also be a string of characters following the base URL which will determine at what point in your RTD account a user will land. Each account has a unique name AND a unique string of characters. Furthermore, the only URLs that will work for non-admin users are the forward-facing URLs, so you don’t ever have to worry about accidentally linking to an admin page.
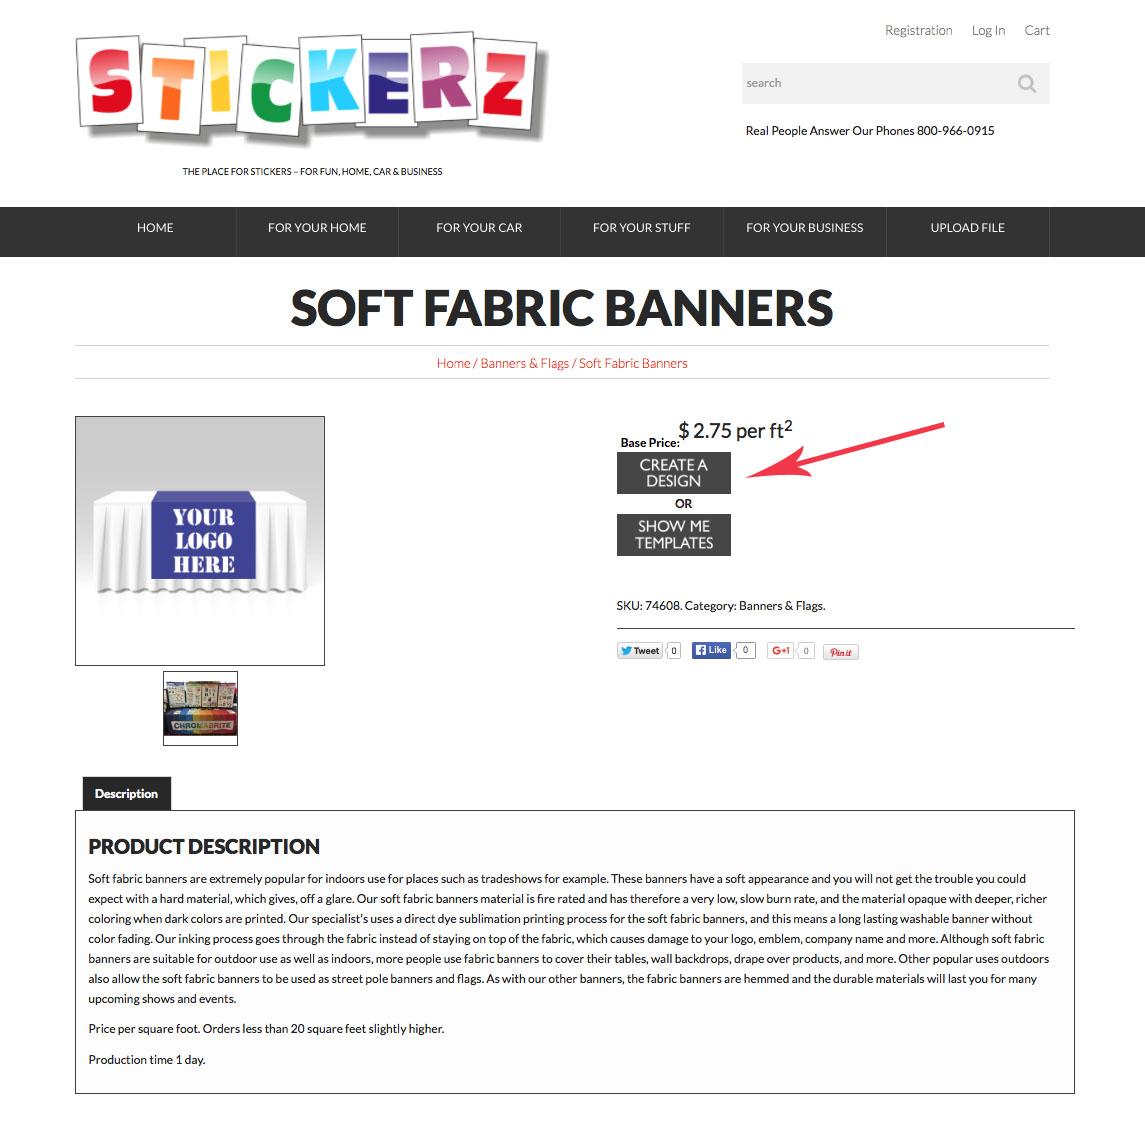
In the image above, you’ll see that the website has a “CREATE A BUTTON” design. This particular website incorporates a more complex method of integration which we will cover in another post later on, but the concept is similar. At this point, you would link OUT of your website and INTO RealTimDesigner. However, in order to do so, you’ll need to know where to find the URL for your products. There are two ways to find these URLs.
Pull The Link From Your Admin Panel
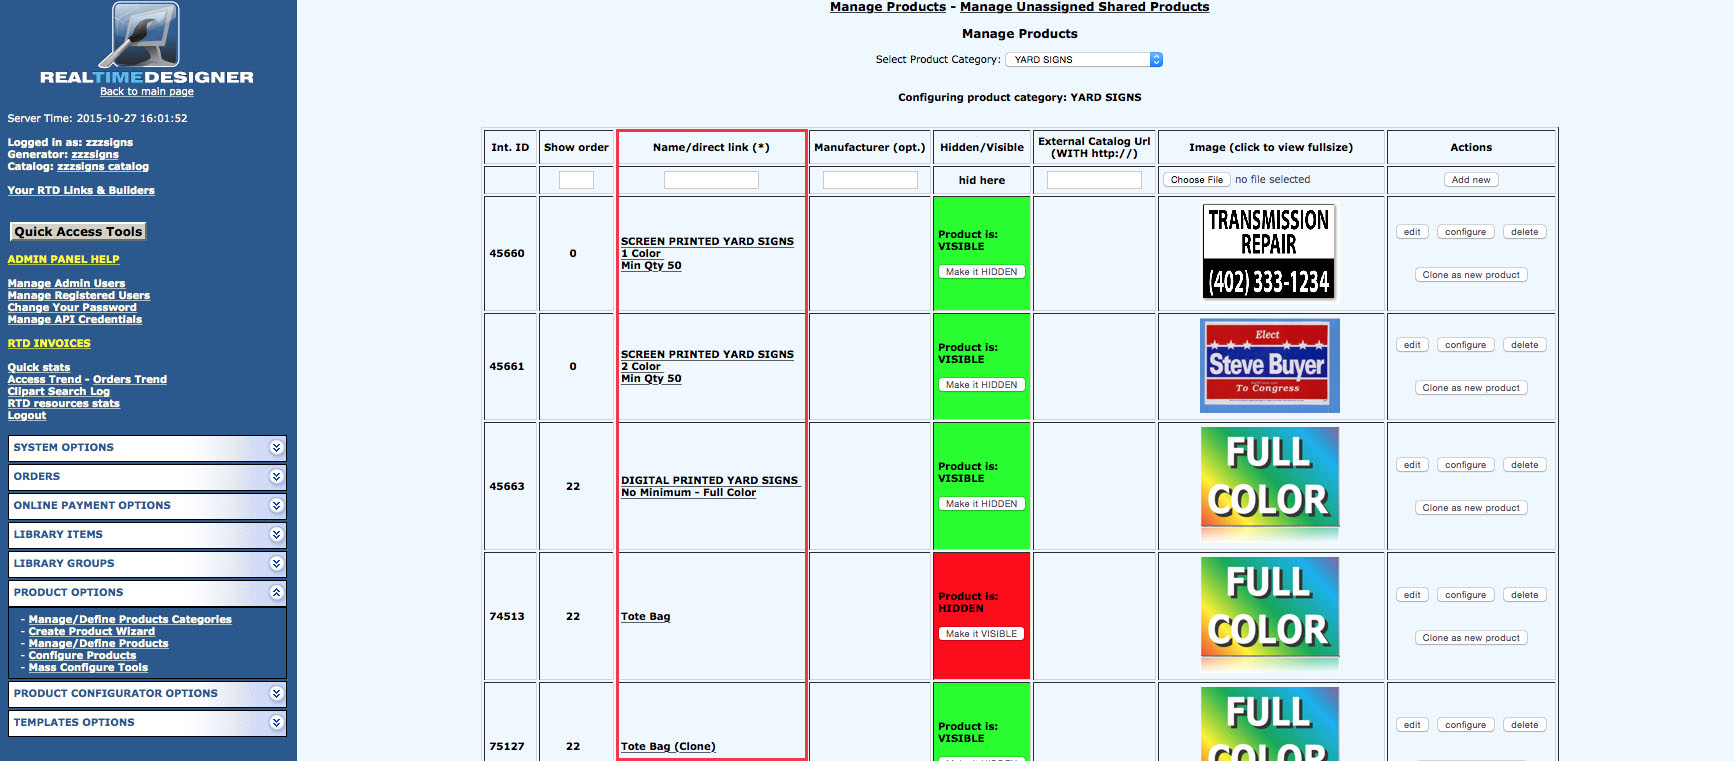
Your admin panel contains all the tools you need to manage products including finding their links. This can be easily done by navigating from within your admin panel to Product Options > Manage/Define Products and then selecting a Product Category. Once here, you will see that the third column is labeled Name/direct link. You can generate a link by right clicking and copying the URL. Alternatively, you can left click to launch the product. If you are not viewing a specific configuration panel, the designer link will launch your default product.
This is a great method for pulling product links, because it allows you to do so quickly and without having to launch the designer each time like pulling from the catalog would require. You can immediately see all of the products available for a certain category as well as quickly change categories.
Pull The Link From Your Catalog
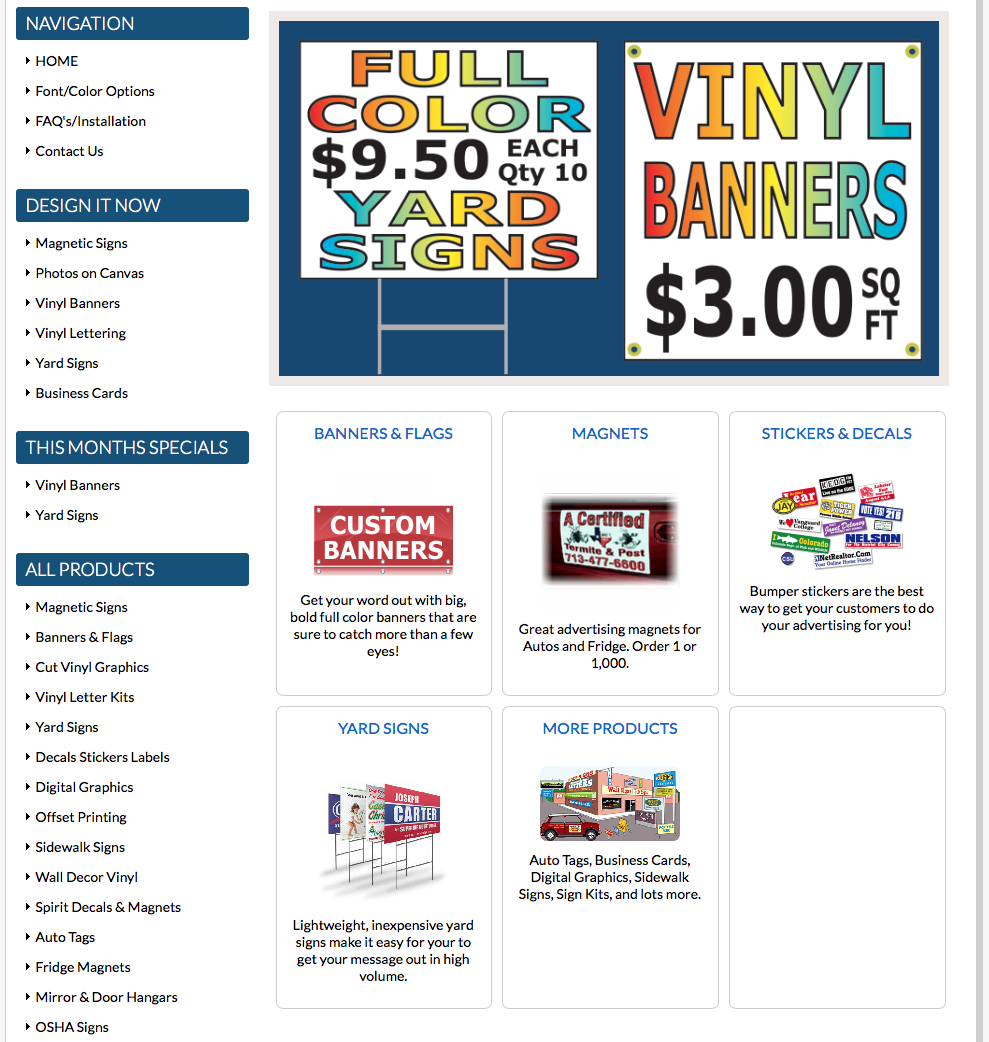
As you’re customizing, adding and removing products from your RealTimeDesigner Admin Panel, you’ll also be building a catalog of products in your account. RealTimeDesigner does this automatically as you’re changing products from category to category and so on. Your catalog is always accessible and you can share it with your clients. The URL for the catalogs are usually http://designer.realtimedesigner.com/companyname/catalog.
To pull links, you will need to navigate all the way through the catalog until you enter the designer. This requires selecting a category, product, size and anything else before you see the designer. You can also pull template URLs from the same location if you have them active. Also remember that each time you click and load a page, there is a new unique URL which can be shared or linked to in order to direct visitors to a specific area.
You can learn more about the catalog here and the templates here, as well as in future posts.
Other Methods For Integration
In addition to this basic, but effective integration, we have many other options. Some clients use iframes, pop overs or, if they’re really enterprising, they will integrate with external shopping carts. If you want more information on integration with external or existing shopping carts, we suggest taking a look at our integration guidelines here. If there are questions not answered there, you can always contact us directly and someone would be happy to answer all your questions! If you’ve come up with any new and exciting ways to integrate, we would love to see them! Just leave a comment below and let the discussion begin!